Using Meshnet To Create Your Own VPN Step By Step Guide
1. Create a DigitalOcean account and log in.
2. Create a new project or use a default one.
3. Choose an authentication method.
4. Open terminal and type “ssh root@,” then paste your IPv4 address and hit enter.
5. Confirm your fingerprint by typing in “Yes” and hitting enter.
6. Download and run the install script of NordVPN Linux app.
7. Log into your NordVPN account.
8. Scroll down to the bottom and click “View details” under Meshnet.
9. Click “Set up NordVPN manually” and generate your token.
10. Copy it and go back to the terminal.
11. Use your token to log in to Nord Account.
12. Type “NordVPN meshnet peer list” into the terminal.
13. You will see the device and the hostname of the device you’re connected to via SSH.
14. Grab another device and install the NordVPN app on it.
15. Log in.
16. Turn on Meshnet.
17. Click “Route traffic.”
Troubleshooting tips:
1. Make sure all the NordVPN apps on your devices are up to date.
2. If the Linux device is not showing up on other devices, you can try refreshing Meshnet. To do that, type “nordvpn meshnet peer refresh” into the terminal.
3. If issues persist, reach out to NordVPN
The more time you spend online, the more information you reveal about yourself. That’s why using a VPN is a good idea — protecting your browsing activity increases your privacy. But did you know you can do this yourself? For free? Check out this tutorial on how to create your own VPN.
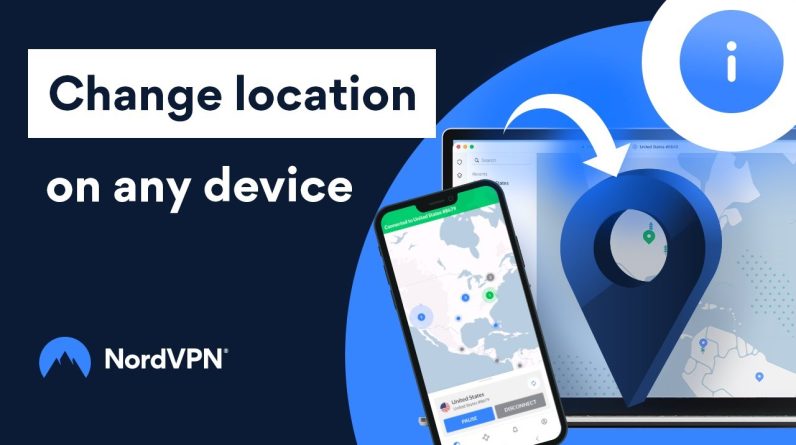
Meshnet’s traffic routing feature lets you securely change your public IP address. With Meshnet you can set up one of your devices to act as a VPN server without additional software.
Contents:
00:00 Intro
00:35 What is a VPN?
01:45 Commercial VPN vs. Meshnet
02:03 What is DigitalOcean?
03:19 Create your own VPN
Many apps, services, and products are marketed as free, but upon closer examination, there’s always something else you’re paying with. Most of the time, it’s your personal information.
However, there are exceptions to free services. That’s why I want to show you how to set up your own VPN service with the Meshnet feature of NordVPN and a DigitalOcean Droplet. But before we dive into the details and steps of the tutorial, let’s make sure we’re on the same page.
What Is A VPN?
First and foremost, what is a VPN? And before we get into the technical jargon of encryption, tunneling, public and private keys, it’s essential to grasp the core concepts of a VPN. The acronym VPN stands for Virtual Private Network, which essentially creates a secure connection between your device and the rest of the internet. But you might wonder, how is this more secure? There are two main parts to it.
The first part is increased privacy, achieved by routing all your traffic through an exit server used by thousands of other users simultaneously. This makes it challenging for anyone to determine the source of the traffic. The other part is encryption, which, despite sounding complex, is akin to writing a letter using numbers representing letter positions in the alphabet. For instance, my name would be represented as 1-4-1-13.
Commercial VPN vs. Meshnet
A similar process happens within a VPN. Anything routed through your VPN is encrypted, making it difficult for anyone to intercept or access your data. Now, what distinguishes a commercial VPN from Meshnet?
Meshnet permits direct and secure connections between devices, as if they were on the same physical network, allowing for file sharing, remote desktop access, or multiplayer gaming among users.
Now that we understand the key differences between Meshnet and a typical VPN, let’s talk about DigitalOcean.
Digital Ocean
DigitalOcean is a popular cloud hosting service provider that enables you to effortlessly deploy and manage virtual servers known as Droplets. Think of a Droplet as a remote computer you can configure based on your requirements. DigitalOcean offers flexibility in choosing your Droplet’s specifications, such as the operating system, CPU, memory, and storage.
It provides an economical and reliable service we’ll utilize to set up our own VPN service. While there are alternative VPS providers, Oracle, at the time of this recording, has an always-free tier. If you wish to explore other options, our documentation contains information on various hosting providers.
Keep in mind one important aspect. With a VPN provider like NordVPN, you have more privacy because your traffic can’t be traced back to you. However, with a DigitalOcean droplet, you’ll still have to sign up with your name, meaning the traffic can eventually be traced back to you. So, if privacy is a must for your specific use case, consider a paid VPN provider like NordVPN.
The first step is to create a DigitalOcean account. Head over to digitalocean.com, sign up for a new account, and log in.
Now, we can create your Droplet. The most critical aspect is choosing the region as it determines your exit location. For example, if you select Singapore, your VPN will have a Singaporean IP. The fantastic part is that you can set up your VPN service virtually anywhere in the world, even in locations where other commercial VPNs may not have servers.
There are various Droplet types available, with prices ranging from a few dollars to a few hundred per month. You can choose the one that suits your needs, as DigitalOcean offers a two-month trial period with a $200 credit.
Next, select an authentication method. For this tutorial, we’re using a password. Ensure that your root password is secure. Now, generate a hostname that’s more fitting than the default one.
After generating the IPv4 address, use your terminal to SSH into your virtual machine. Once connected, download the install script for NordVPN Linux.
To activate NordVPN on the Droplet, log into your Nord Account using a token. To generate a token, visit the NordVPN website, log in to your account, scroll down to the NordVPN Meshnet Free section, and click “Set Up NordVPN Manually.” From there, you can create a token that doesn’t expire or expires within 30 days. Make sure to securely store your token, as it won’t be displayed again once you close the page.
With your token securely copied, return to the Droplet terminal. Use your terminal and the token to log into your Nord Account. Then, you can easily find the name of your Droplet within the Meshnet network by using the ‘NordVPN meshnet peer list’ command.
Now, grab another device, like a mobile phone or computer. Install the NordVPN app, log in with the same account, and enable Meshnet. To connect, simply click ‘Route all traffic’ under the Droplet device within the Meshnet.
Finally, check if your VPN is working by examining your IP address and its associated location.
If you encounter any issues or need further assistance, don’t worry! Troubleshooting is part of the process, and additional resources are available to help you. Check the video description for helpful links and troubleshooting tips.
That’s it! You’ve learned how to create your very own VPN service using DigitalOcean as your hosting provider. With DigitalOcean’s Droplets and the power of NordVPN Meshnet, you can enjoy a secure and private internet connection anytime and anywhere. Keep in mind that this solution doesn’t provide the same level of privacy as a commercial VPN provider like NordVPN would. While the connection is fully encrypted, most cloud server providers can disclose your personal information to authorities if required by law.
If you found this tutorial helpful, please like this article and visit Get Hitch for more tech tutorials.
Read Get Hitch for all your AI, VPN, tech and cyber security news and information